One client switched to using Floor Shark, saved 40 hours of manual labor, and was able to deliver his print 7 days faster to his customer.
The traditional way of making floor graphics is a painfully slow process involving printing on vinyl, and laminating it with an anti-slip or textured laminate, before die-cutting and applying. Not with Floor Shark.
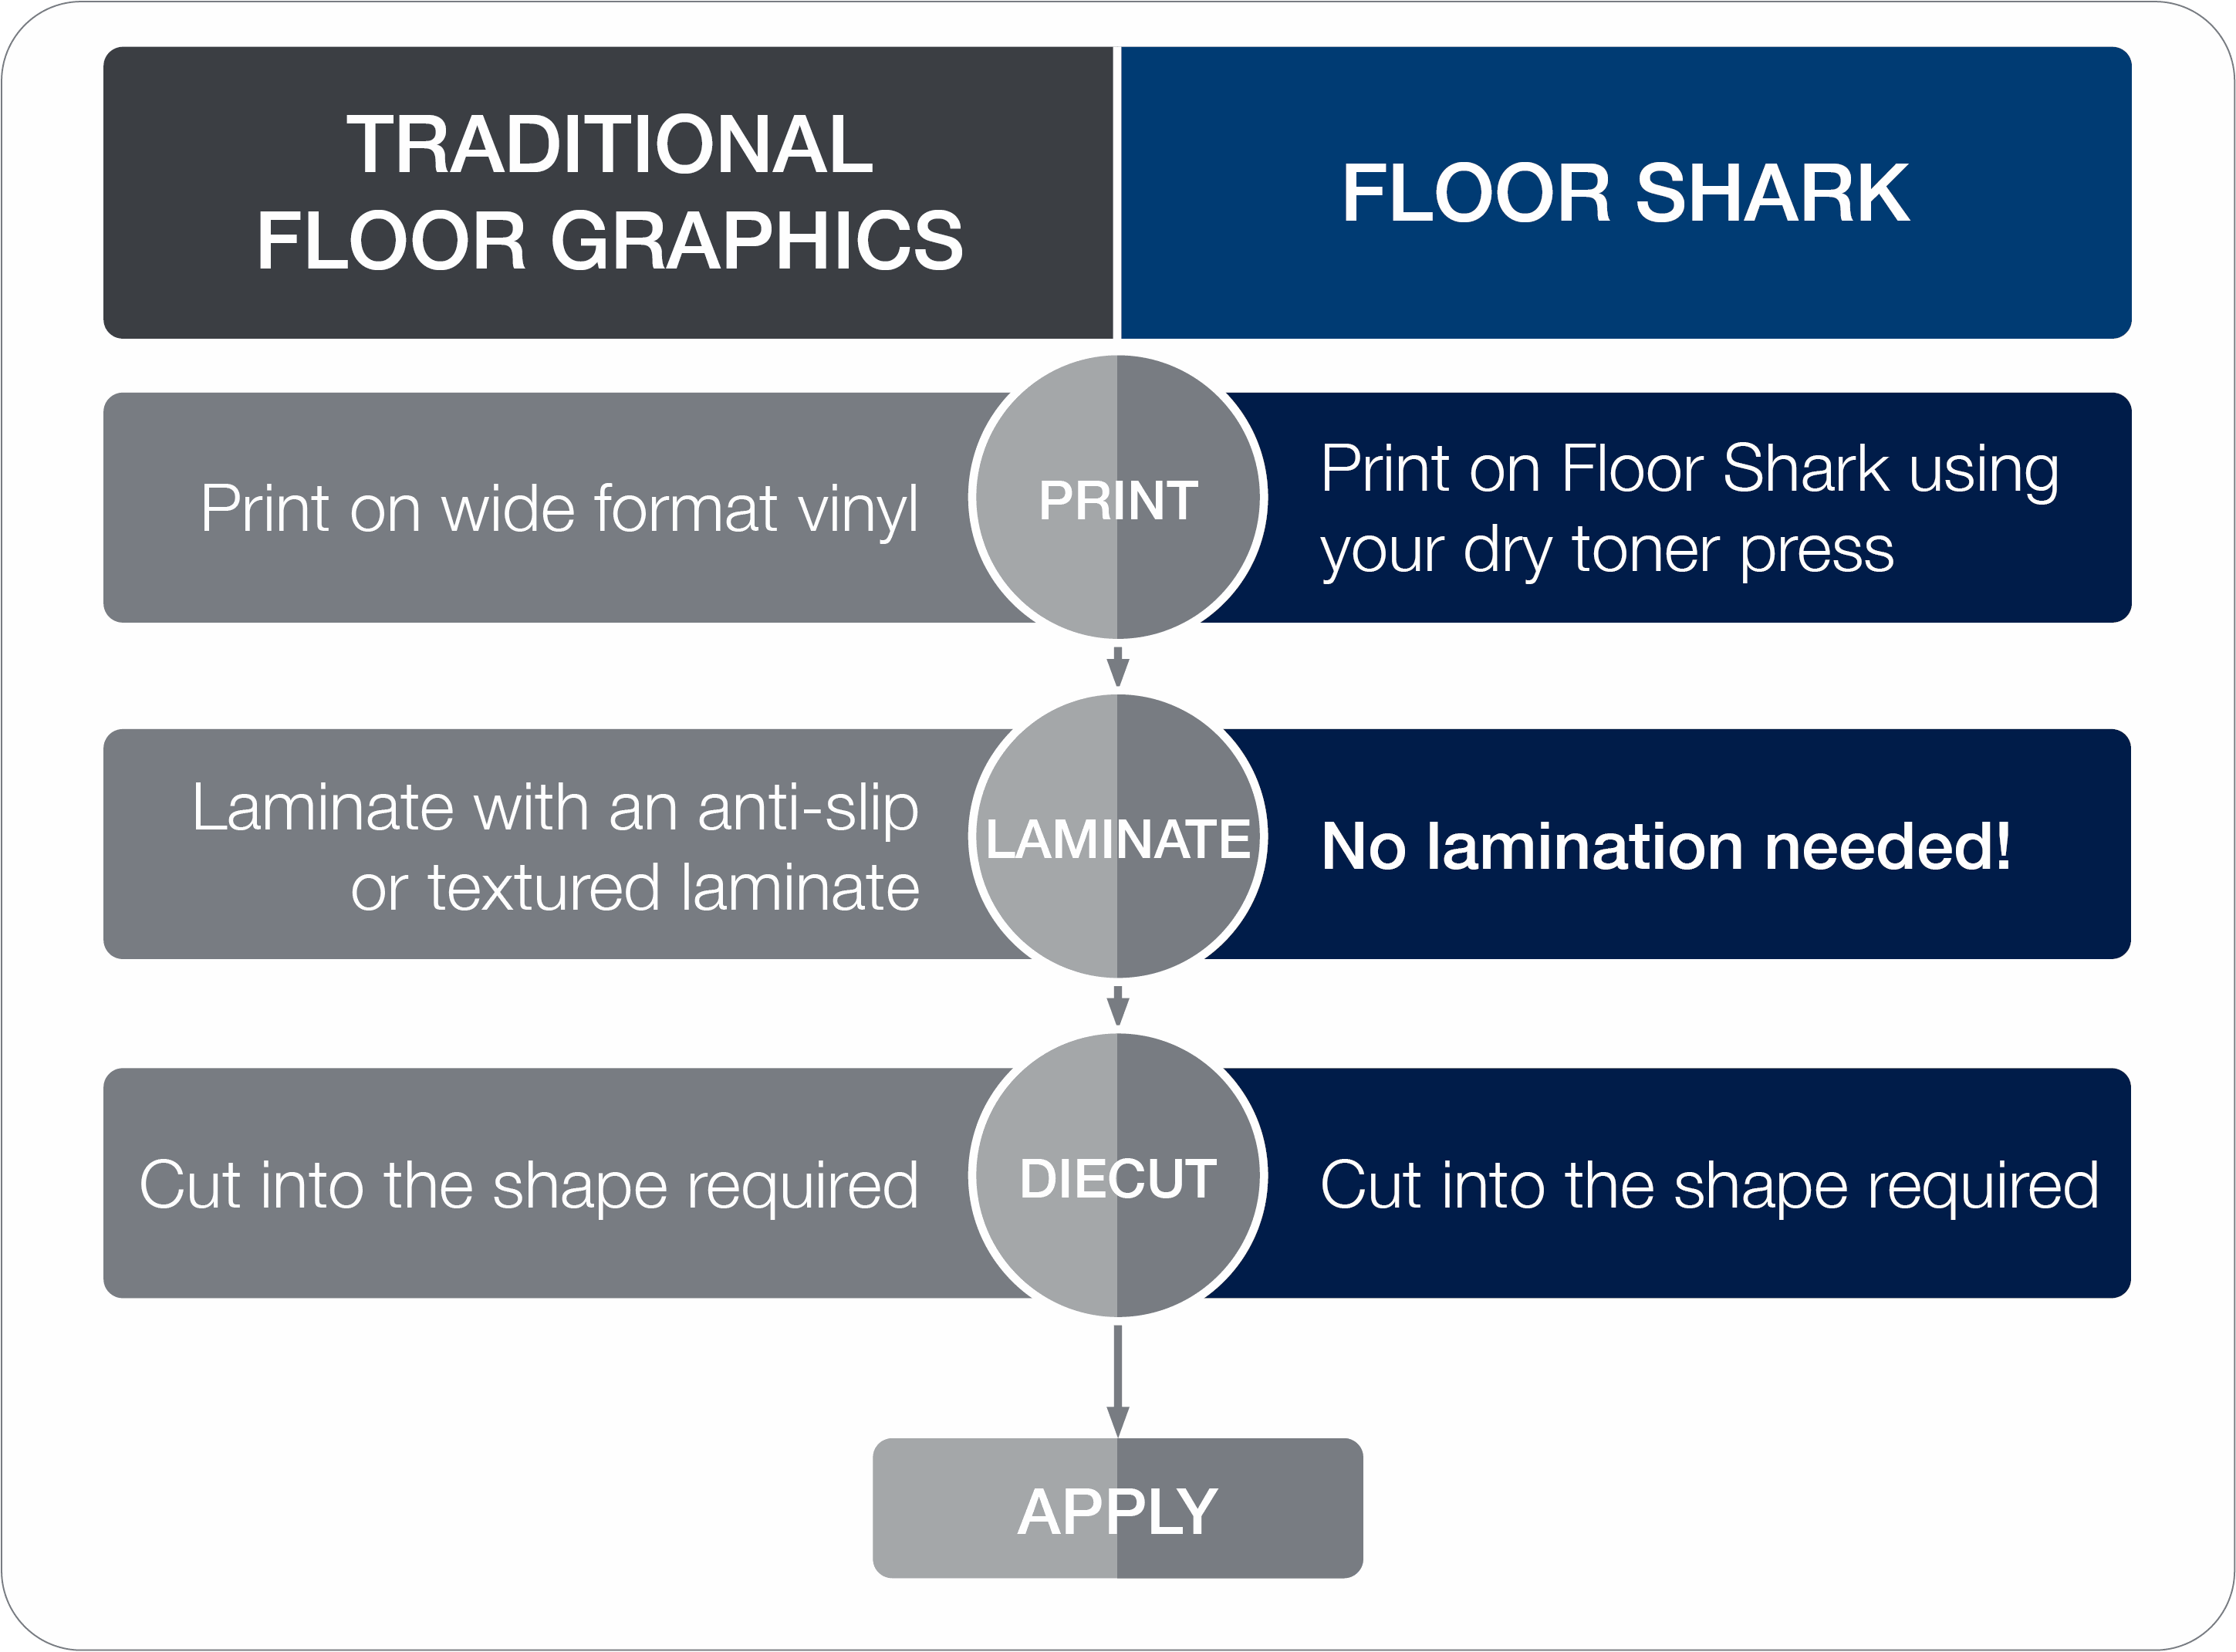
Benefits of Traditional Floor Graphics
Although the traditional method is a prolonged process, it's ideal if you're making very large, wide format graphics, or large quantities of graphics.
But the pandemic made that an issue because large supermarket chains, retail stores, banks, etc. all needed smaller floor graphics and hundreds of them. And that's the gap that Floor Shark fills.
Floor Shark
By eliminating the lamination step, Floor Shark's proprietary shark skin technology allows you to print directly onto the material using your dry toner press. Then without lamination, you can go straight to the die-cutter and then to the floor.
And the time savings don't end there. With Floor Shark, you can produce as much as 36 smaller graphics off your dry toner system in the time it takes to load a wide format inkjet roll.
Benefits of Floor Shark
Save on lamination time
Eliminates off-gassing or delamination issues
Designed for use with dry toner presses, so you can use this at a fraction of the cost of printing it on inkjet
Eliminates distortion
Extremely durable
Safety certified (R10 and NC 137.1 slip ratings, BFL S1 flame retardants)
Watch the full session from Print2Finish 2020 where we unpacked why Floor Shark works here. Or purchase Floor Shark online here.